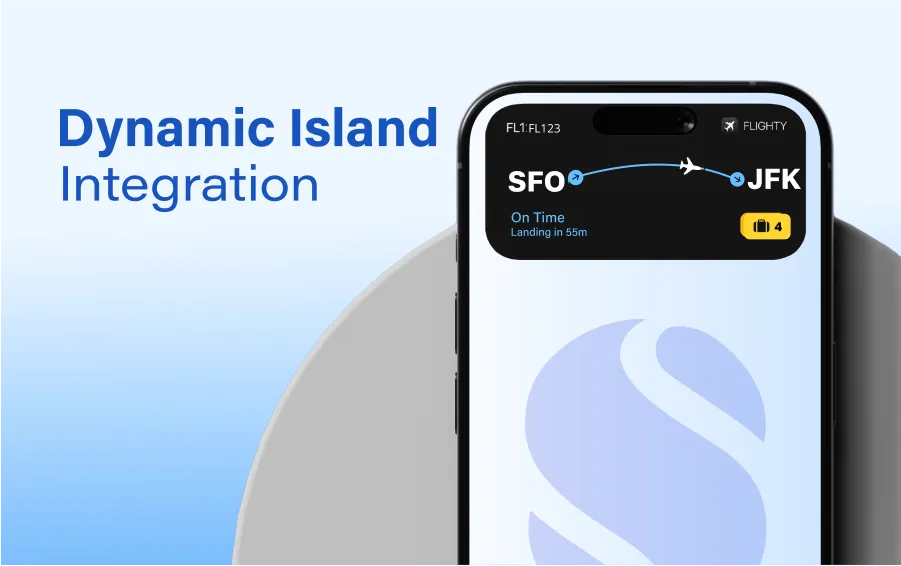
Dynamic Island Integration

What is a dynamic island?
Dynamic Island is one of Apple’s most innovative features. Apple introduced it with the iPhone 14 Pro series. It replaces the notch and adapts to your activities. This design offers a smooth user experience. It shows system alerts, background tasks, and interactive notifications. The Dynamic Island feature is a new UI element on iOS platforms that helps show notifications and pop-up components. It adds dynamics and interactiveness.
This feature enhances user engagement by allowing real-time updates for apps such as:
- Music playback (e.g., Spotify, Apple Music)
- Timers and countdowns
- Live navigation
- Food delivery and ride-tracking apps
- Call notifications
As iPhone Dynamic Island becomes more popular, developers want to add it to their apps. This guide shows you how to integrate Dynamic Island with SwiftUI. It includes technical steps, code snippets, and best practices.
How to use dynamic island SwiftUI?
It's common practice in iOS applications development to use Live Activities and WidgetKit to create real-time updates. These updates will show up on Dynamic Island.
Step 1: Setting Up the Project
Before you start using the iPhone Dynamic Island, ensure you have:
- Xcode 14 or later
- iOS 16 or later
- A real iPhone 14 Pro (or newer) (since Live Activities don’t work on the simulator).
- The WidgetKit framework supports live activities.
- Xcode enables the correct Dynamic Island settings.
After this
- Open Xcode and create a new project.
- Select “App” under iOS.
- Choose Swift as the language.
- Name your project and set other options as needed.
Configure Info.plist
- You may need to add certain permissions or features if your app needs them. But, for basic Dynamic Island use, the default settings should be enough.
Enable Push Notifications to Your App:
- Open the project settings in Xcode.
- Select your target and go to the “Signing and Capabilities” tab.
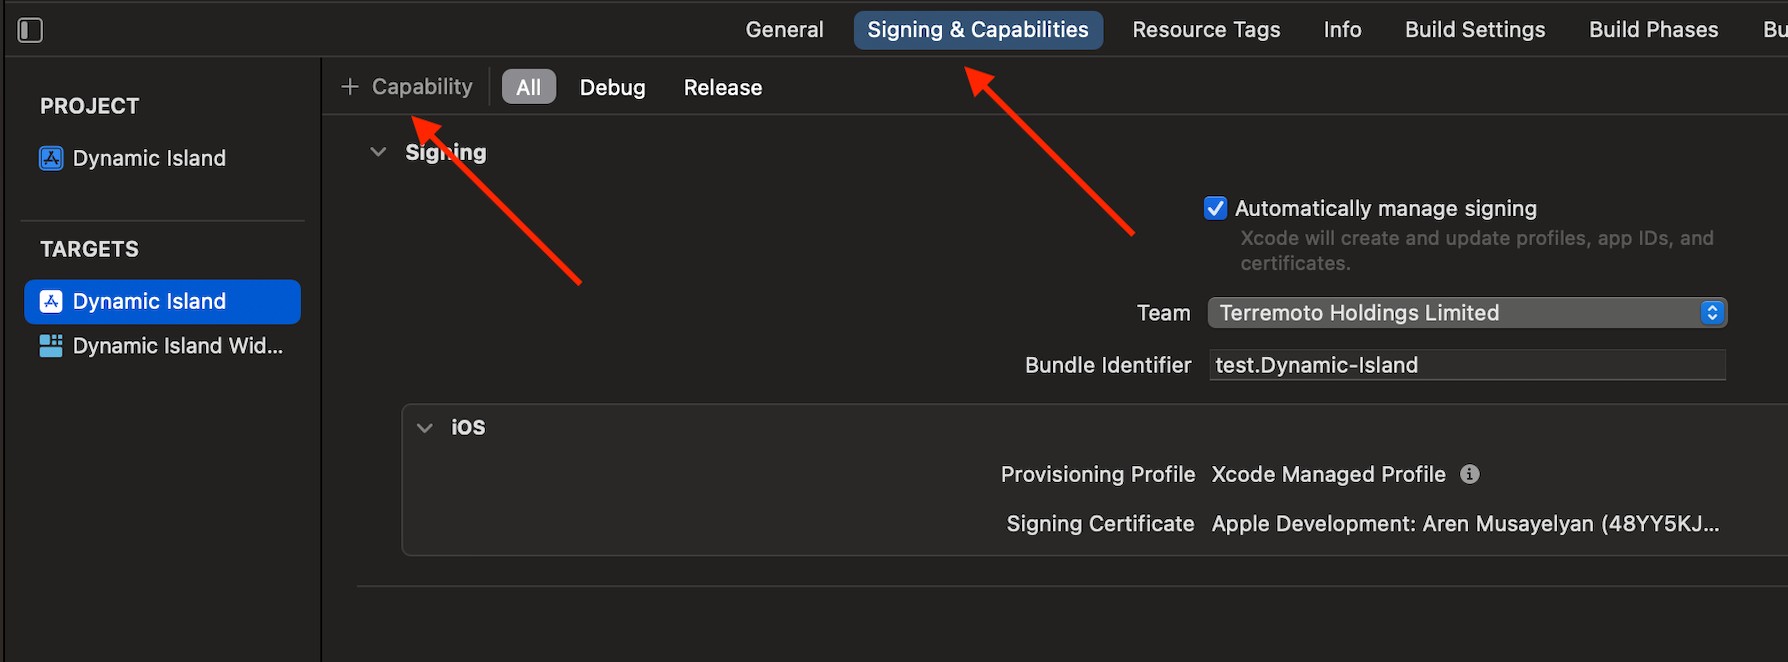
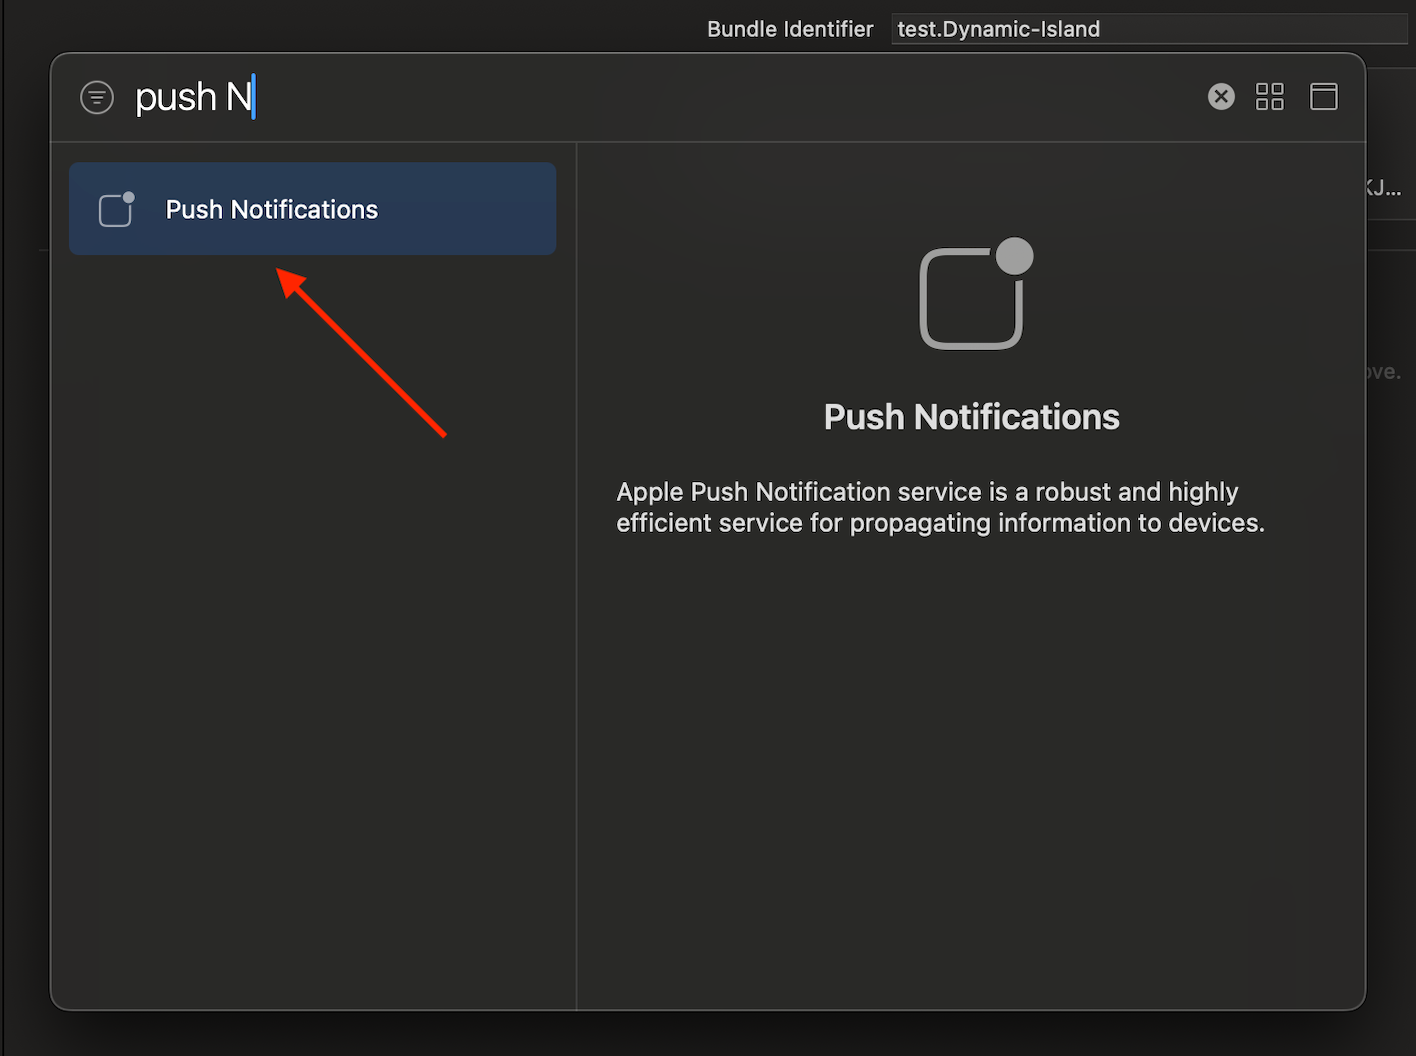
- Click the “+” button and choose “Push Notifications.”
Step 2: Creating Live Activity Attributes
To use Dynamic Island, we define Activity Attributes that describe the live event.
import ActivityKit
import Foundation

struct WidgetAttributes: ActivityAttributes, Identifiable, Equatable {
    public typealias Content = ContentState

    // MARK: - ContentState
    public struct ContentState: Codable, Hashable {
        var tokenName: String
    }

    // MARK: - Properties
    var id = UUID()
    var price: Double
    var percentage: Double
    var name: String
    var isSignalUp: Bool

    static func == (lhs: Self, rhs: Self) -> Bool {
        lhs.id == rhs.id
    }
}
Step 3: Creating the Live Activity View
This step defines how Live Activities will appear on the iPhone Dynamic Island.
Create a Widget Extension
- Select Project Navigator and Click the “+” button.
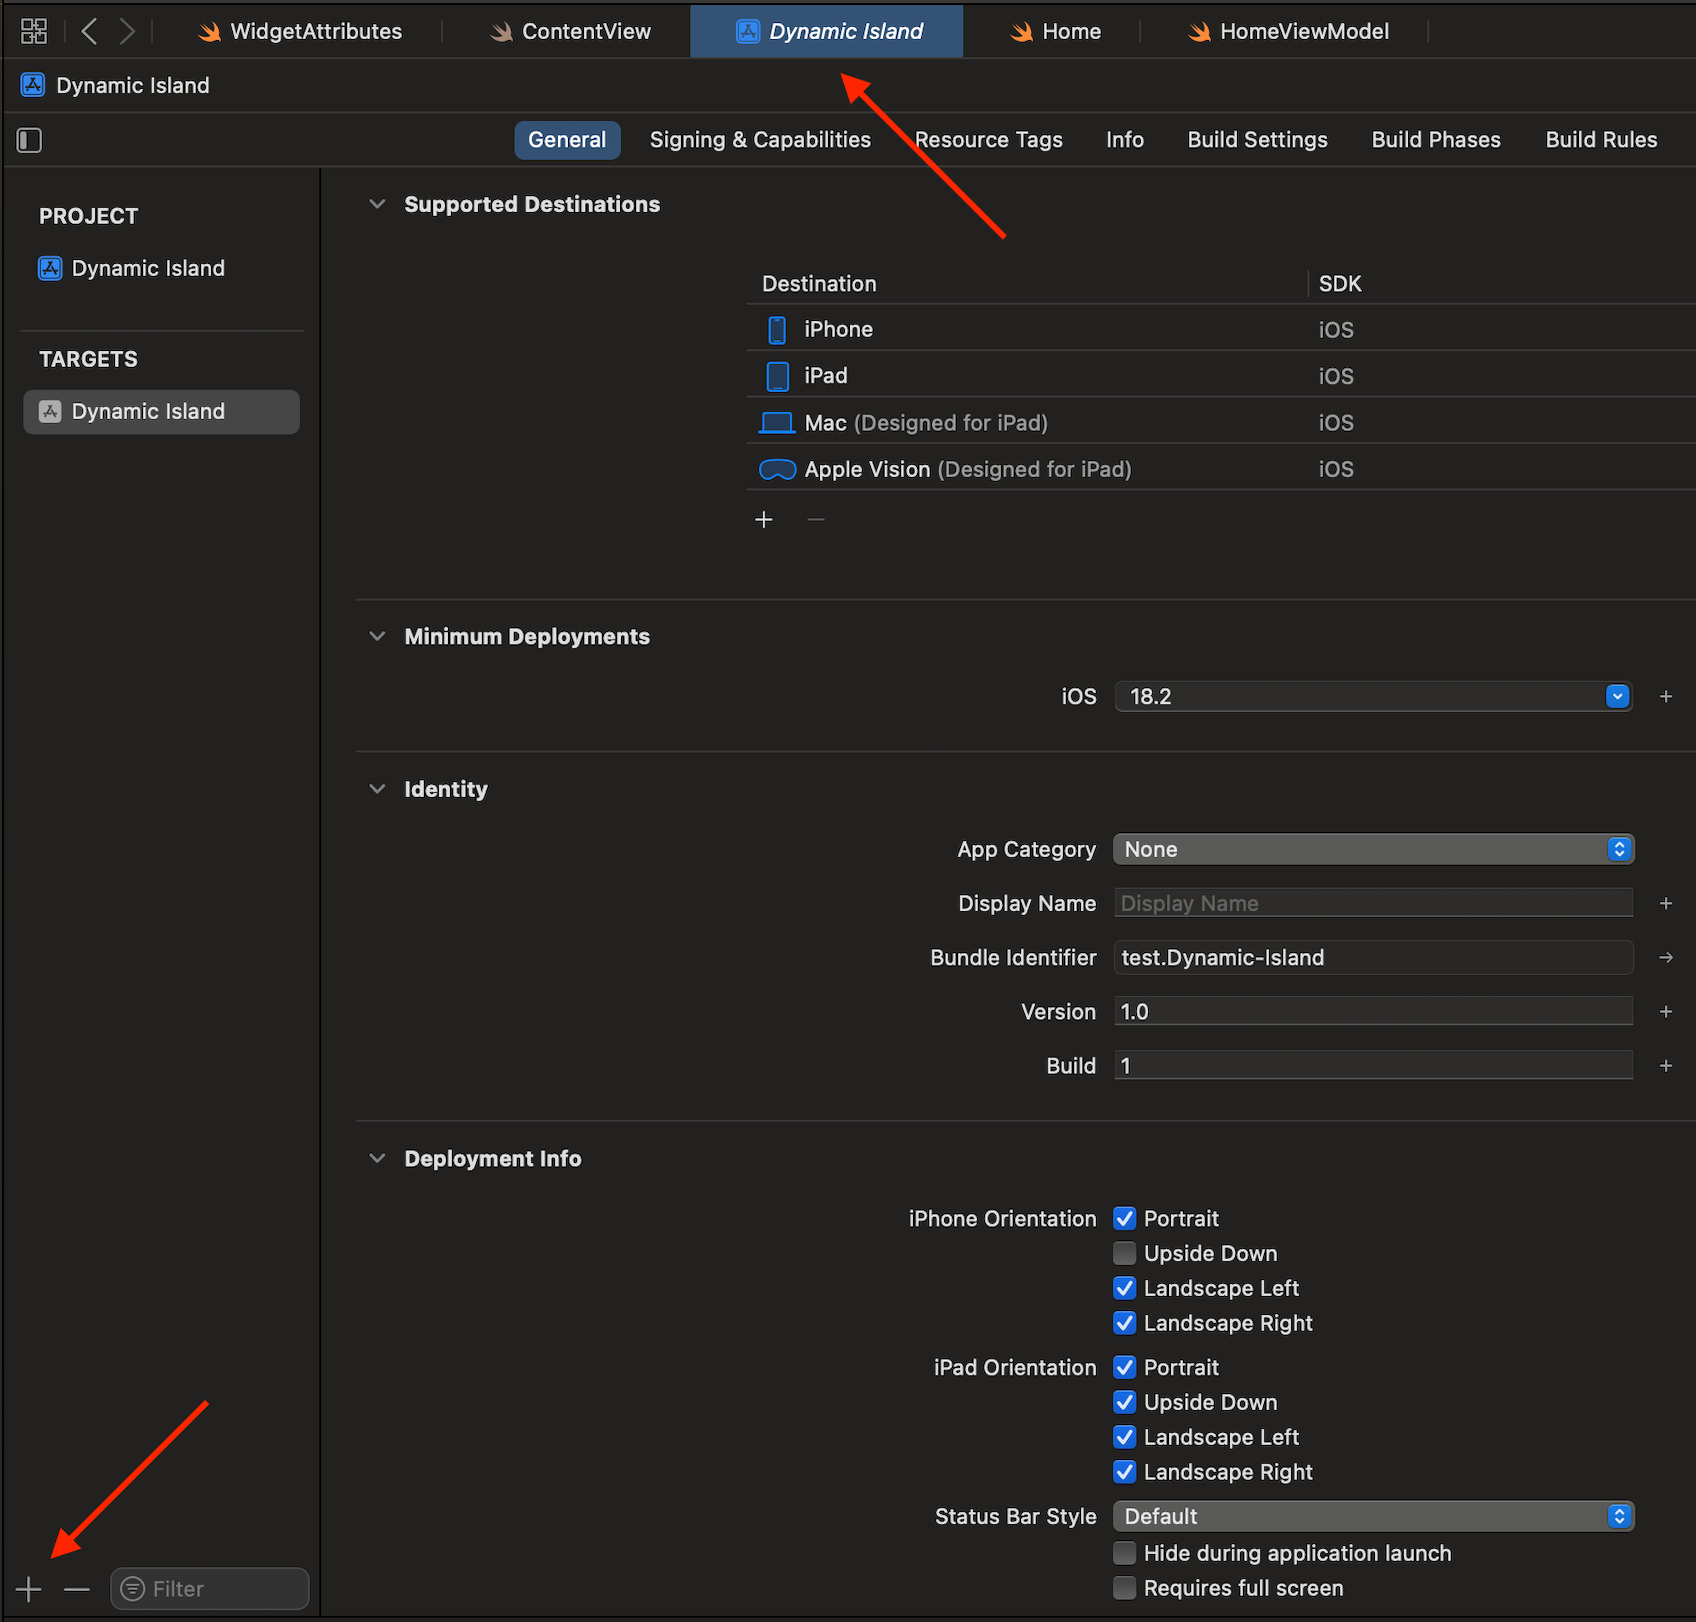
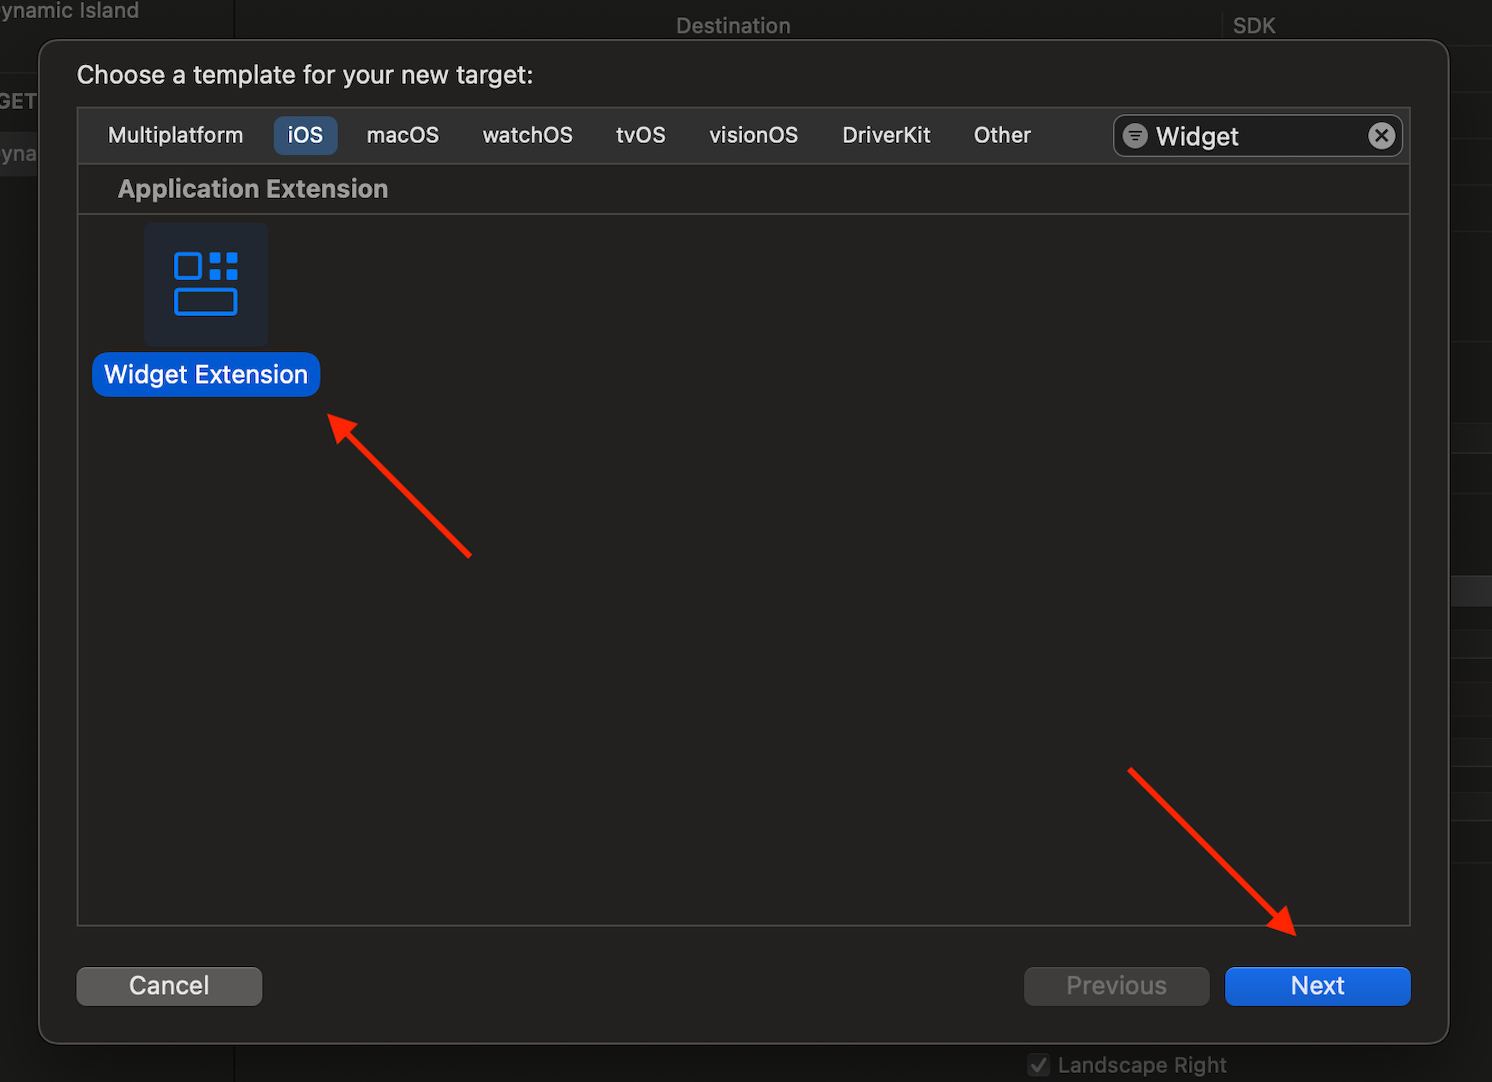
- Select Widget Extension and Click the “Next” button.
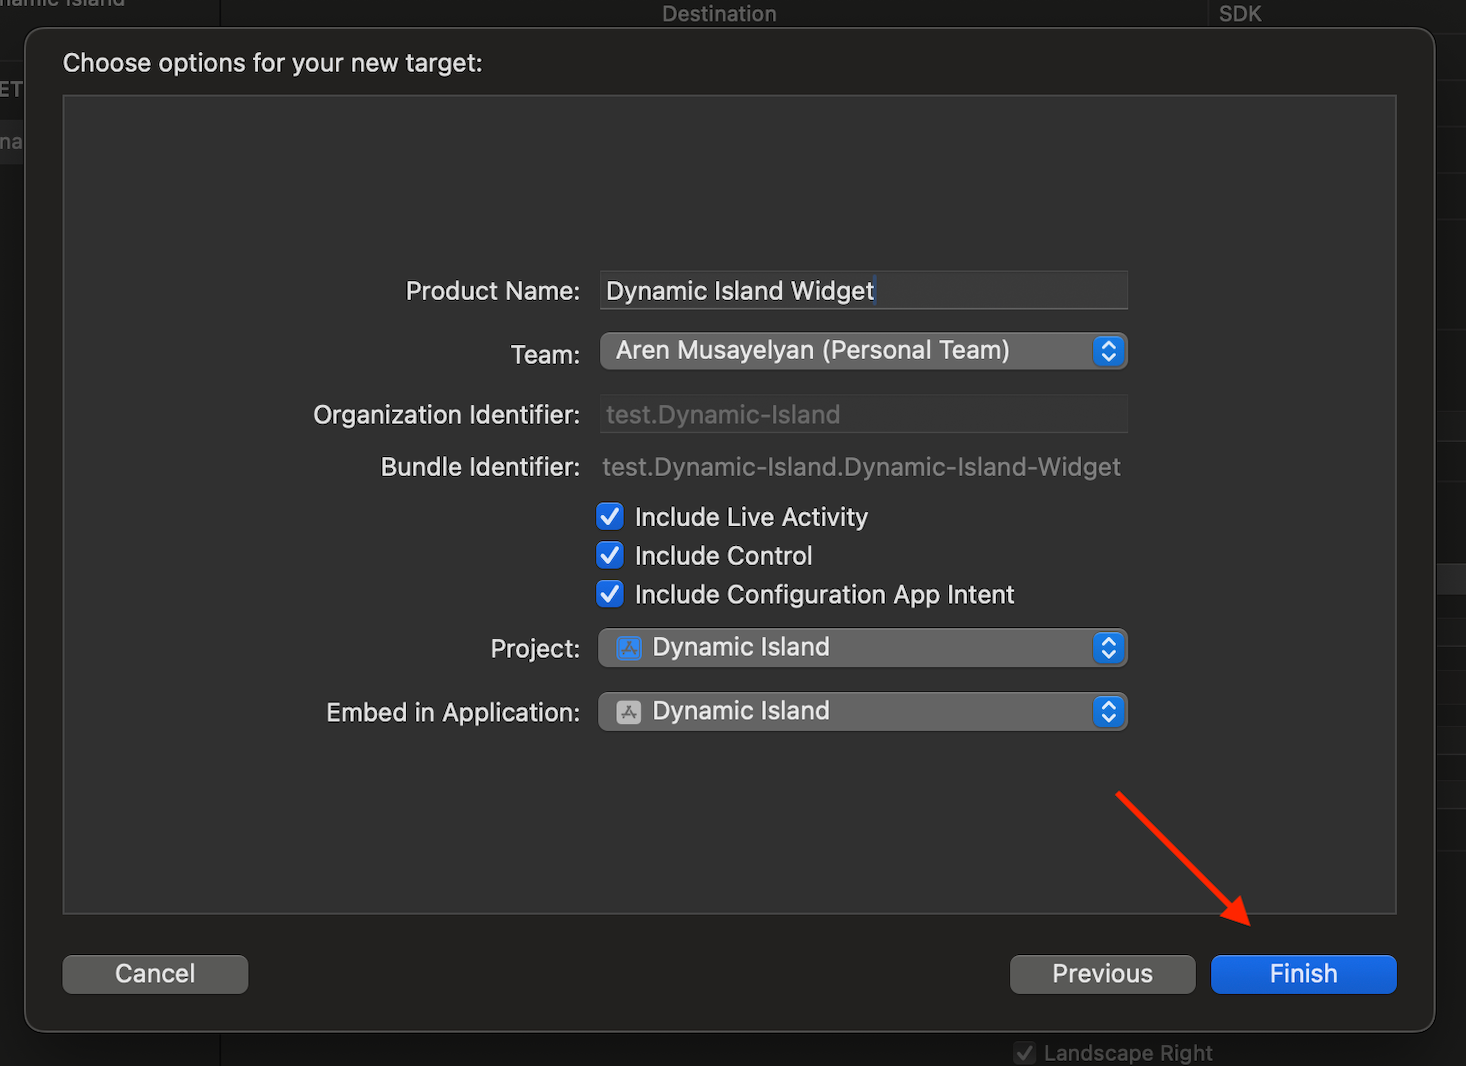
- Write the product name, for example, "Dynamic Island Widget," and then click the "Finish" button.
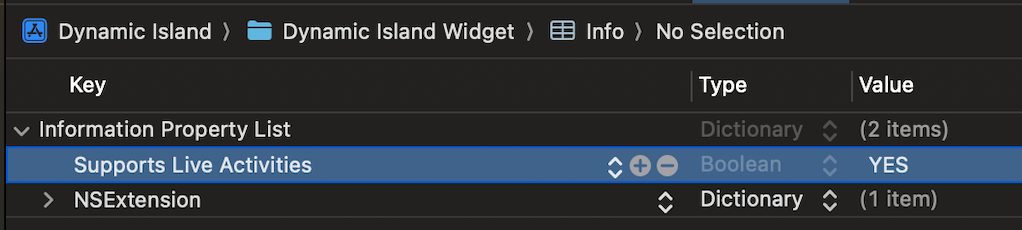
- Also, enable support for Live Activities in the Info.plist file.
- Update AppWidget.swift
import SwiftUI
import WidgetKit

// MARK: - AppWidget (Main Widget)
struct AppWidget: Widget {
    var body: some WidgetConfiguration {
        ActivityConfiguration(for: WidgetAttributes.self) { context in
            LiveActivityView(context: context.attributes)
        } dynamicIsland: { context in
            let viewModel = WidgetViewModel(attributes: context.attributes)
            return DynamicIsland {
                DynamicIslandExpandedRegion(.leading) {
                    imageWithTextPair(imageName: "apple.logo", text: "Signal Up", fontSize: 12)
                }
                DynamicIslandExpandedRegion(.trailing) {
                    expandedTrailingView()
                }
                DynamicIslandExpandedRegion(.center) {
                    expandedCenterView(viewModel: viewModel)
                }
                DynamicIslandExpandedRegion(.bottom) {
                    expandedBottomView(viewModel: viewModel)
                }
            } compactLeading: {
                compactLeadingView(viewModel: viewModel)
            } compactTrailing: {
                compactTrailingView()
            } minimal: {
                AnyView(EmptyView())
            }
            .keylineTint(.cyan)
        }
    }
}

// MARK: - Views
func expandedBottomView(viewModel: WidgetViewModel) -> some View {
    HStack {
        expandedButtonView(viewModel: viewModel, title: "Signal Up", color: .customGreen,
isSignalUp: viewModel.attributes.isSignalUp)
        expandedButtonView(viewModel: viewModel, title: "Signal Down", color: .customRed,
isSignalUp: !viewModel.attributes.isSignalUp)
    }
}

func expandedButtonView(viewModel: WidgetViewModel, title: String, color: Color, isSignalUp: Bool) -> some View {
    if let generatedURL = viewModel.generateURL() {
        return AnyView(
            Link(destination: generatedURL) {
                Text(title)
                    .font(.system(size: 14, weight: .semibold))
                    .padding(7)
                    .frame(maxWidth: .infinity)
                    .background(isSignalUp ? color : .gray.opacity(0.2))
                    .clipShape(Capsule())
                    .foregroundColor(isSignalUp ? .black.opacity(0.8) : color)
            }
        )
    } else {
        return AnyView(Text("Invalid URL").foregroundColor(.white))
    }
}

func expandedCenterView(viewModel: WidgetViewModel) -> some View {
    VStack(spacing: 6) {
        HStack(spacing: 0) {
            Image("solana-logo")
                .resizable()
                .aspectRatio(contentMode: .fit)
                .frame(width: 20, height: 20)

            Text(viewModel.attributes.name)
                .font(.system(size: 12, weight: .semibold))
                .foregroundColor(.white)
        }
        .padding(.horizontal)

        HStack(spacing: 0) {
            Text(viewModel.formattedPrice())
                .font(.system(size: 26, weight: .semibold))
                .foregroundColor(.white)

            Text(viewModel.formattedPercentage())
                .font(.system(size: 10, weight: .semibold))
                .padding(4)
                .background(viewModel.signalColor())
                .clipShape(Capsule())
                .foregroundColor(.black)
        }
    }
}

func compactLeadingView(viewModel: WidgetViewModel) -> some View {
    HStack(spacing: 4) {
        Image("solana-logo")
            .resizable()
            .aspectRatio(contentMode: .fit)
            .frame(width: 24, height: 24)

        Text(viewModel.formattedPercentage())
            .font(.system(size: 12, weight: .semibold))
            .foregroundColor(viewModel.signalColor())
    }
    .padding(.leading, 6)
}

func compactTrailingView() -> some View {
    Image("chart")
        .resizable()
        .aspectRatio(contentMode: .fit)
        .frame(width: 45, height: 20)
}

func expandedTrailingView() -> some View {
    HStack(spacing: 6) {
        Text("Open App")
            .font(.system(size: 12, weight: .semibold))
            .foregroundColor(.white)

        Image(systemName: "chevron.right")
            .resizable()
            .aspectRatio(contentMode: .fit)
            .frame(width: 8, height: 8)
            .foregroundColor(.white)
    }
    .frame(width: 80)
}

func imageWithTextPair(imageName: String, text: String, fontSize: CGFloat) -> some View {
    HStack(spacing: 6) {
        Image(systemName: imageName)
            .resizable()
            .aspectRatio(contentMode: .fit)
            .frame(width: 14, height: 14)
            .foregroundColor(.white)
        Text(text)
            .font(.system(size: fontSize, weight: .semibold))
            .foregroundColor(.white)
    }
    .frame(width: 80)
}
Step 4: Creating a Live Activity
// MARK: - Create Activity
func createActivity() {
    let signal = generateRandomSignal()
    let attributes = WidgetAttributes(
        price: signal.price,
        percentage: signal.percentage,
        name: signal.name,
        isSignalUp: signal.isSignalUp
    )
    let content = WidgetAttributes.Content(tokenName: signal.name)

    do {
        // Request a new activity
        let activity = try Activity<WidgetAttributes>.request(
            attributes: attributes,
            content: ActivityContent(state: content, staleDate: nil),
            pushType: .token
        )

        // Update state after activity creation
        DispatchQueue.main.async {
            self.currentActivity = activity
            self.activityID = UUID()
        }
    } catch {
        // Handle any errors that may occur
        print("Error requesting activity: \(error.localizedDescription)")
    }
}
Step 5: End the Live Activity
// MARK: - End Activity
func endActivity() {
    guard let activity = currentActivity else { return }

    let endContent = ActivityContent(state: WidgetAttributes.Content(tokenName: "Ended"), staleDate: Date())

    // MARK: - End activity asynchronously
    Task {
        await activity.end(endContent, dismissalPolicy: .immediate)
        DispatchQueue.main.async {
            withAnimation(.easeInOut(duration: 0.5)) {
                self.currentActivity = nil
                self.activityID = UUID()
            }
        }
    }
}
Conclusion
You can show real-time updates on the iPhone 14 Pro and newer models. Integrate Dynamic Island with SwiftUI and Apple Live Activities. By following this guide, you have:
- Enabled Dynamic Island settings in Xcode.
- Defined Live Activity Attributes using ActivityKit.
- Created a widget extension to display updates on Dynamic Island.
- Requested and started a live activity when an event begins.
- Updated Live Activity Content to reflect changes in real-time.
- End the Live Activity when the event is complete.
You can use SwiftUI and WidgetKit to create interactive experiences. This keeps users informed without having to open the app. Dynamic Island boosts user engagement by showing important updates. These include order tracking, sports scores, ride-sharing progress, and more.
Test your setup on a real iPhone 14 Pro or newer. Check for smooth transitions and updates.
Okay, let's remember this
If you are experienced in custom mobile app development: android apps development services, or iOS app development, or you provide native app development services, you should always step in parallel with technology to produce what today's user wants.
Dynamic Island is Apple's way of turning the iPhone's notch into something useful. Instead of a static black cutout, it's an interactive area that changes shape to show important updates (incoming calls, music playing, timers, or directions). The coolest thing - without interrupting what you're doing.